Perfectly Random
machine learning and stuffAlways on top in MacOS Sierra
Afloat is a software that allows some Mac application windows to remain on top of other windows even when they are not in focus. Hence the name Always on Top. This is a standard feature for all windows in Ubuntu but in Mac we need to use a third-party software like Afloat to get this functionality. As of writing this post, Afloat is the only software I have seen that can let us do this on a Mac. If you want to learn more about Always on Top or Afloat, I recommend reading my original post (with pictures) on this topic.
The original post contained instructions on how to setup Always on Top using Afloat on MacOS Yosemite and El Capitan. Those instructions have become really old and do not work on Mac OS Sierra (10.12). This post presents a new set of instructions on how to enable Always on Top in MacOS Sierra. If you have an older MacOS, please follow the instructions in the original post.
The instructions are provided as General Steps and Specific Instructions. For each general step, I have provided at least one specific set of instructions that worked for me. You may choose to perform specific instruction in different ways, depending on what resources you already have available.
General Steps
- Install SIMBL
- Obtain
Afloat.bundlefolder - Drop
Afloat.bundlein SIMBL plugins folder. - Test, restart (if necessary), test, restart (to re-enable SIP), test
Specific Instructions
1. Install SIMBL
Previously, for MacOS Yosemite and El Capitan, SIMBL 0.9.9 worked but it does not seem to work for MacOS Sierra. While there could be many sources of SIMBL, mySIMBL works for me on MacOS Sierra and it is easy to install. Here are the specific steps that worked for me.
Install mySIMBL. You can simply follow the instructions in mySIMBL README. During the installation of mySIMBL, it might ask you to disable System Integrity Protection (SIP), which requires you to boot in Recovery Mode. mySIMBL will instruct you if you need to do this and how to do it. The only thing I have to add is that you only need to disable SIP for installing mySIMBL. Once mySIMBL and Afloat are installed, you can re-enable SIP. Instructions for re-enabling SIP are provided in this post below.
Alternative to downloading mySIMBL zip file from GitHub, you can use MacUpdate if you trust it.
2. Obtain Afloat.bundle
These are multiple methods to obtaining Afloat.bundle folder. Once you obtain this folder, I recommend that making a more long-term backup of this folder (Google Drive, for example) for future use.
Method 1: Search if you already have it.
You might have Afloat.bundle from previous Afloat installation. That bundle should work nicely. If you have installed Afloat before, don’t uninstall or delete it yet. Find the folder Afloat.bundle on your computer and copy it somewhere safe. Some places to look for it are /Library/Application Support/SIMBL/Plugins and ~/Library/Application Support/SIMBL/Plugins.
OR
Method 2: Download from the Internet.
If you have never installed Afloat before, then you need to obtain Afloat.bundle. You can find this folder in Rocky Wu’s GitHub repository here. You can either clone the afloat repository using git or you can download the afloat folder as a zip file and unzip it. Once you have cloned/downloaded the afloat folder, navigate to afloat/bundle/Afloat.bundle. You will need this folder later.
OR
Method 3: Build it yourself (difficult).
You can clone the Afloat repository and use Xcode to build it yourself. Check your deploy location for a Afloat.bundle folder.
2. Drop Afloat.bundle in SIMBL plugins folder
- Run mySIMBL using the MacOS search bar (pressing
Command+Spaceand typing inmySIMBL). - Copy/paste the
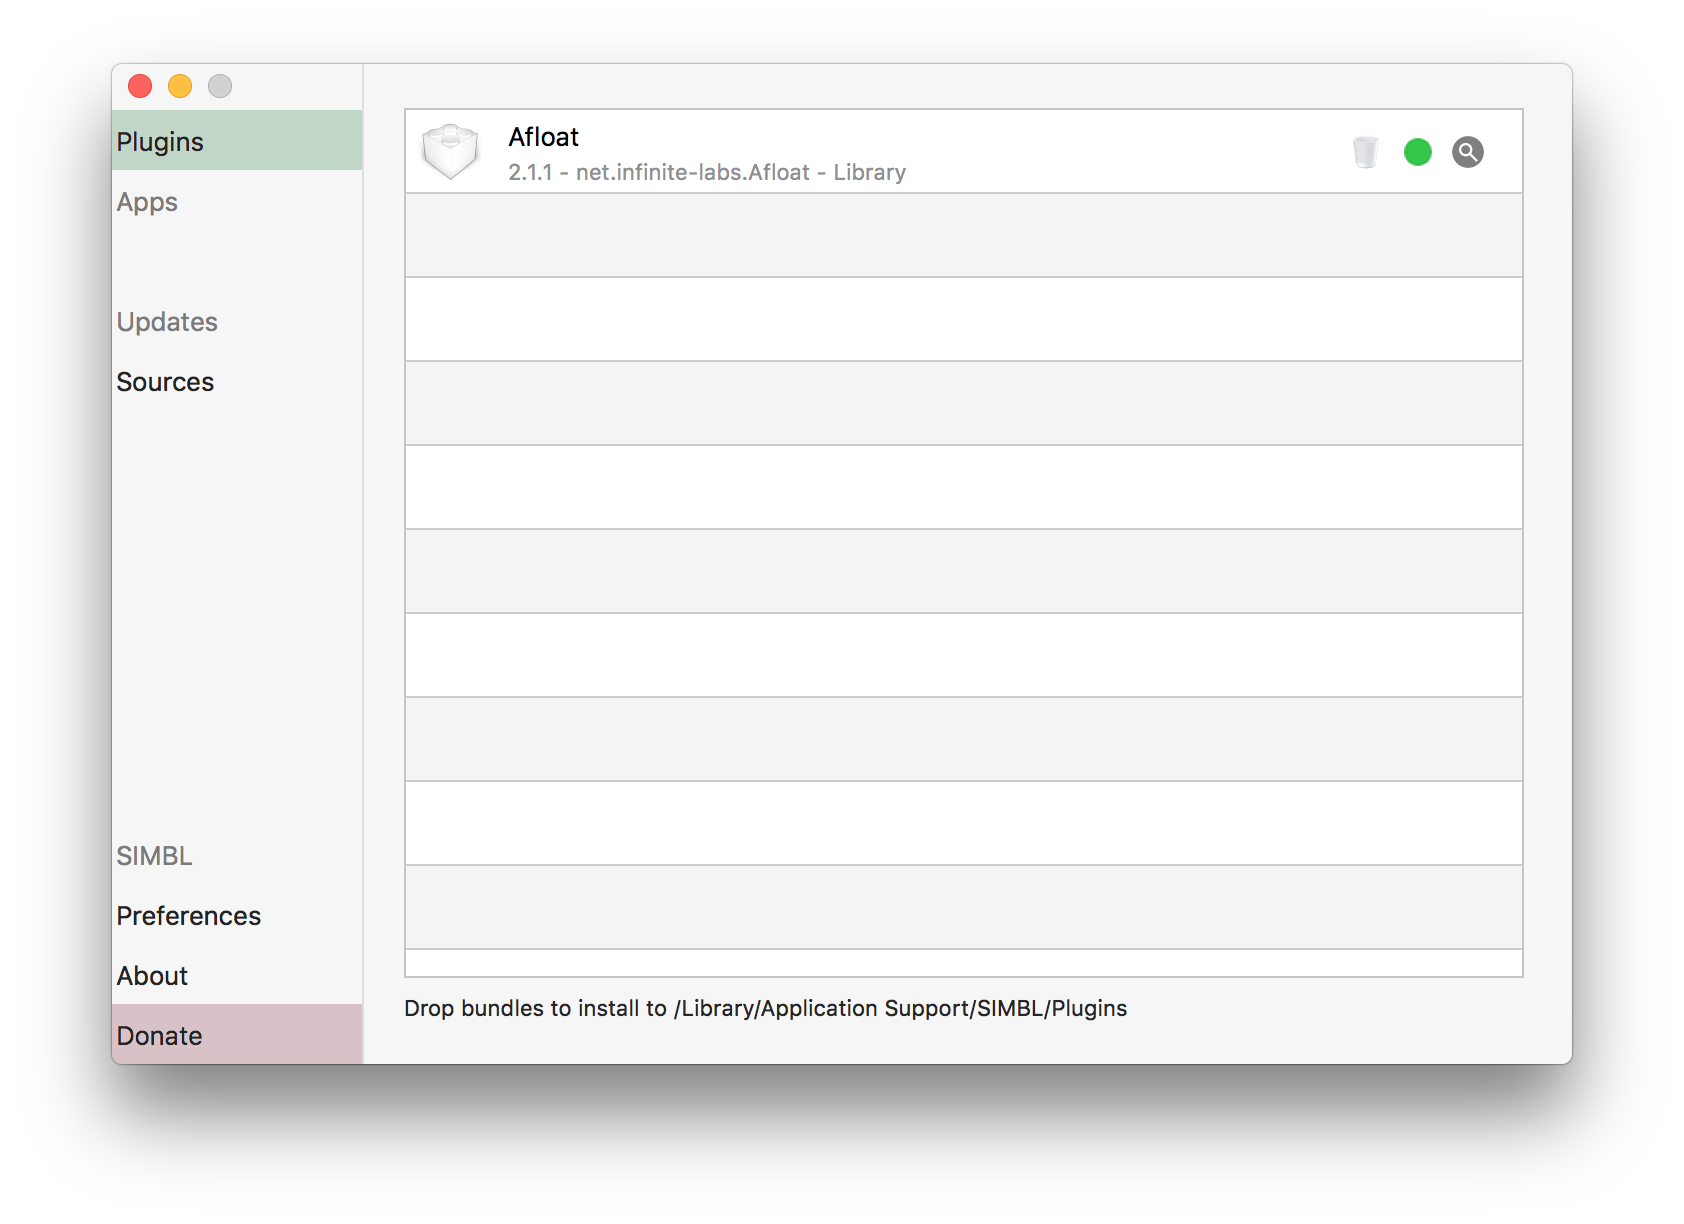
Afloat.bundlefolder into the plugins folder/Library/Application Support/SIMBL/Plugins. mySIMBL will also provide this instruction to you. - Ensure that
Afloatappears in mySIMBL Plugins window and that there is a green dot next to it, as shown in the picture below.
4. Test, restart (if necessary), test, restart (to re-enable SIP), test.
a. Test, restart (if necessary), test.
Restart any windows on which you want to use Afloat. Click on the Window menu to see if you can see this kind of menu.
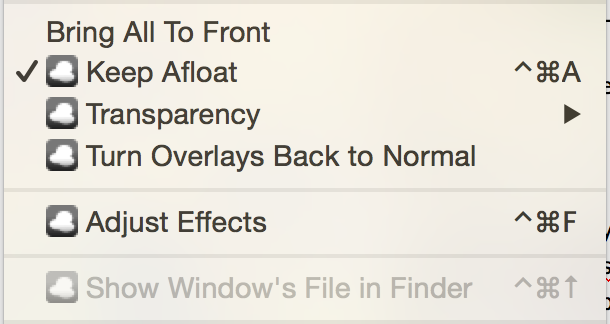
Note that not all applications support Afloat. I can confirm that Afloat works on iTerm2. Press the Afloat key (Control+Command+A by default) and test it out to ensure that it works. If you don’t see it yet, don’t give up yet. There may still be hope. Restart your computer and test again.
b. Restart to re-enable SIP (optional but recommended), test. If you have SIP disabled, you can re-enable it. You should do this after you have ensured that Afloat is working for you. Re-enabling SIP does not stop Afloat from working. Here are the steps to re-enable it.
- Reboot into Recovery Mode by restarting and holding down
Command+R. - Click
Utilities > Terminal. - Type in
csrutil enable; rebootand pressEnter. - Restart your Mac.
- Test Afloat again.
Troubleshooting
Restarting computer usually helps immensely with everything. Often, after a few updates, Afloat stops working for me. In most cases, simple restart fixes the problem. It’s only when MacOS changes named versions that you things get really messy.
Good luck!